


The iPhone 17, iOS 26, and even the new AirPods Pro 3, are packed with valuable features and tools, but it can be hard to know which ones are worth your time and where to find them.
I review phones for a living and have been using the iPhone 17 Pro for over two months. As I’ve tested the new Apple phone and accessories, I’ve amassed my share of hidden tips and tricks to quell my friends, family members (and strangers) who ask me, «What’s a good iPhone feature that I should try?» Or «how do you do that thing with your AirPods that I saw on TikTok?»
These tips may not be new to everyone or exclusive to the iPhone 17 line (most require iOS 26), but they’re the less obvious ones that I use the most.
1. Photos app Wallpaper Suggestions
Over the years, Apple has given the lock screen and home screen a major visual overhaul. There are endless options to customize the look of your apps, the lock screen clock, and add trippy spatial effects to bring your wallpaper to life.
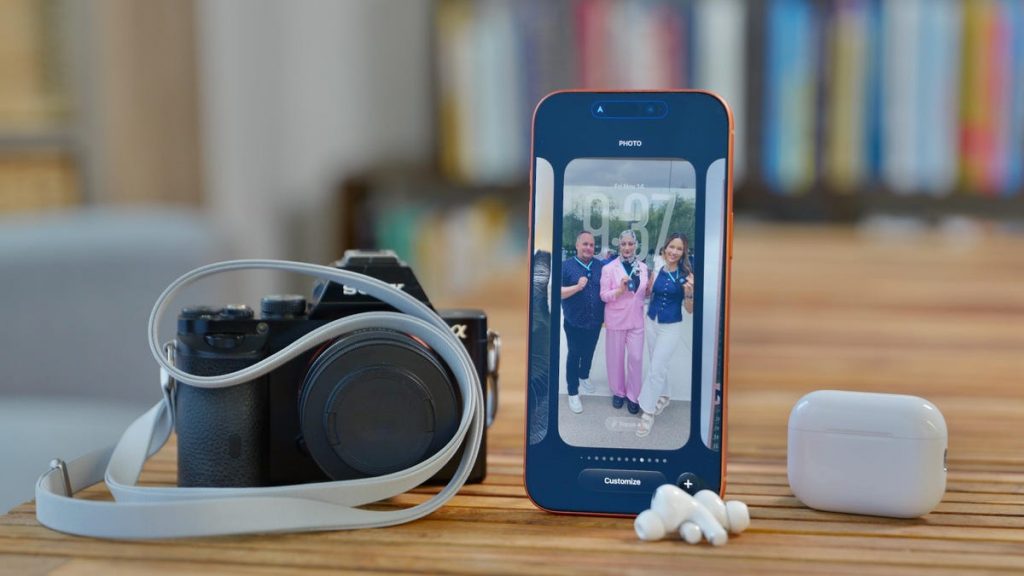
However, one of my favorite recent discoveries is Wallpaper Suggestions in the Photos app, which selects wallpaper-worthy photos from your library and crops them to fit your screen. There is even a 3D animation effect that can be added to really give your wallpaper some pizzazz. Above is a photo of my phone with a wallpaper of one of my cats (from the Suggestions), for example. It delights me to no end that it looks like her head is popping up from the corner of the screen as if to say, «Are you unlocking your phone?!»
If you don’t see Wallpaper Suggestion in the Photos app, go to Settings, then to Photos, and check that Show Featured Content is enabled. Subsequently, if you don’t want to see Wallpaper Suggestions, you can turn them off here. But why would you?
2. Use raw photos to make the moon pop
This tip is for you, Pro iPhone owners and is an easy way to ensure you get a great photo of a high-contrast scene. Think of a bright subject in a dark environment, such as this one of the Mineral Point Opera House marquee lit up at night, or a dark subject in a bright environment, like the black cat wallpaper shot from my previous tip.
Last week, there was a full moon over San Francisco, and I loved the way Karl the Fog –- yep, San Francisco’s marine layer has a name — rolled through the moonlight. However, when I tried to take a photo of it, my phone exposed the image for the bright moon, making everything else look dark. And when I tried to expose the image to brighten the buildings in the background, the moon just blew out entirely to white.
Instead, I turned on the raw photo setting in the Camera app and got a great shot of the moon. Then, I was able to edit it after the fact within the default Photos app to enhance the shadow details in the dark background and highlights in the moon. The result: Both the moon and the buildings looked exactly the way I wanted them. You could also use a third-party app to edit raw images.
Raw files contain more image data than a JPEG or HEIC, allowing you to make more extensive edits after you take an image. I don’t take raw photos all the time because the file sizes are big: the raw photo of the moon is 13.6MB compared with a JPEG I took that was 1.5MB.
To try this out, you first need to turn on the raw files master switch. Go to Settings, then the Camera menu. Select Formats and turn on ProRAW & Resolution Control. I use JPEG Lossless for the ProRAW format.
Once enabled, open the Camera app. If you’re running iOS 26, you should see a button that says JPEG, HEIC or raw on the top left side. Tap on it to see controls for Format and Resolution. Raw images can be captured at 48MP on the iPhone 17 Pro.
3. The AirPods Pro 3 case is the button
Apple recently launched the AirPods Pro 3. They come with several nifty features, including the ability to check your heart rate and translate conversations in real-time. But when I first went to pair them with my phone, I was stumped: Where is the pairing button?
Just me? Probably not.
To pair the AirPods Pro 3, you just keep them in the case and open the lid. They should automatically pair with whatever Apple device you have on hand. But if you’re trying to pair them to an Apple device that doesn’t have the same iCloud account or a non-Apple device, you’ll need to open the lid and double-tap the case to enter pairing mode.
And that’s not the only AirPods tip I have for you (pun unintended).
4. The AirPods automatically turn off music when you doze off
If you’re someone who listens to music, a podcast, or white noise to help you fall asleep, you can set up your AirPods to automatically pause whatever you’re listening to as soon as you fall asleep. To turn this on, have your AirPods in their case, bring the case next to your iPhone and open the lid. Now go to Settings and tap on the name of your AirPods. Next, scroll down to Pause Media When Falling Asleep and turn that setting on. Now sit back, put your AirPods in and enjoy that 80-minute podcast about Mission Impossible: Ghost Protocol while you’re lulled into a nice slumber.
This feature is part of iOS 26 and works with:
- AirPods Pro 3
- AirPods Pro 2 with USB-C
- AirPods Pro 2 with Lightning
- AirPods 4 with ANC
- AirPods Max with USB-C
Also, if you haven’t explored your AirPods settings menu before, you can access many nifty features like Head Gestures, Live Translation and Camera Remote.
5. The iPhone’s invisible button
Back Tap isn’t a new feature, but it’s one that a lot of people don’t know about. Your iPhone has an «invisible» button that you activate by tapping on the back of the phone. It’s customizable and can do things, like open apps, turn the flashlight on, or, as I use it, show/hide the Control Center.
To set it up, open the Settings, go to Accessibility, select Touch and then scroll down and tap Back Tap. You can set up multiple actions, one triggered by a double-tap and another by a triple-tap (I wish I could do this with the iPhone’s Action button). As you can see from the actions menu, Back Tap can perform dozens of different actions and shortcuts.
When I want to open the Control Center — especially if I’m holding the phone with one hand — I can double-tap the back of the phone, and it appears. If I double-tap again, it goes away. Additionally, when you use Back Tap, a small Dynamic Island banner appears to explain what’s happening. You can turn this off in the Back Tap settings menu if you don’t want to see it.
6. Use the iPhone Crossbody Strap for cameras and passes
We’ve seen phone straps from other phone makers, such as Motorola for its Razr and there are numerous third-party options available. However, this year Apple launched its own crossbody strap for the iPhone. The strap costs $60, which seems steep for a thin piece of fabric, but it actually has more «tech» to it than meets the eye. Apple’s Crossbody Strap is lined with magnets to keep the two «pieces» of the strap (where it folds over itself) from separating or accidentally adjusting the length as you wear it.
It also has use cases beyond just being attached to a phone. On TikTok, numerous videos like this show people using the cross-body strap as a camera strap. But why stop there? Use it to hold passes or IDs for amusement parks or conventions.
The strap is long, which is nice if you’re a larger person like me and still has enough length to go across your body and keep your phone or camera at your hip. Apple created another accessory that is having its moment right now: the iPhone Pocket. Like the crossbody strap, you can wear it across your torso, but I’m not sure it would hold anything but an iPhone that well.